There is a specific kind of magic that happens at the end of a beekeeping season. After months of watching your bees zip back and forth from wildflowers to the hive, the moment finally arrives, it’s time to harvest. How to harvest honey is one of the most rewarding parts of beekeeping
If you’re a hobbyist with just a few hives, you might feel intimidated by the professional setups and expensive centrifugal extractors you see online. But here’s a secret, you don’t need fancy machinery to enjoy the literal fruits of your labor. Harvesting honey by hand is a sensory experience that connects you deeply to your colony. The aroma of warm wax, the weight of a full frame, and that first taste of liquid gold make all the hard work worth it.
In this guide, I’ll walk you through the simple Crush and Strain method. It’s the most accessible, low-cost way to get honey from the frame into your jars while keeping all the raw, healthy goodness intact.
Harvesting honey is the “sweetest” part of beekeeping, but it requires a bit of patience and the right technique to ensure you get a clean, delicious product without harming the integrity of the honey.
What You’ll Need
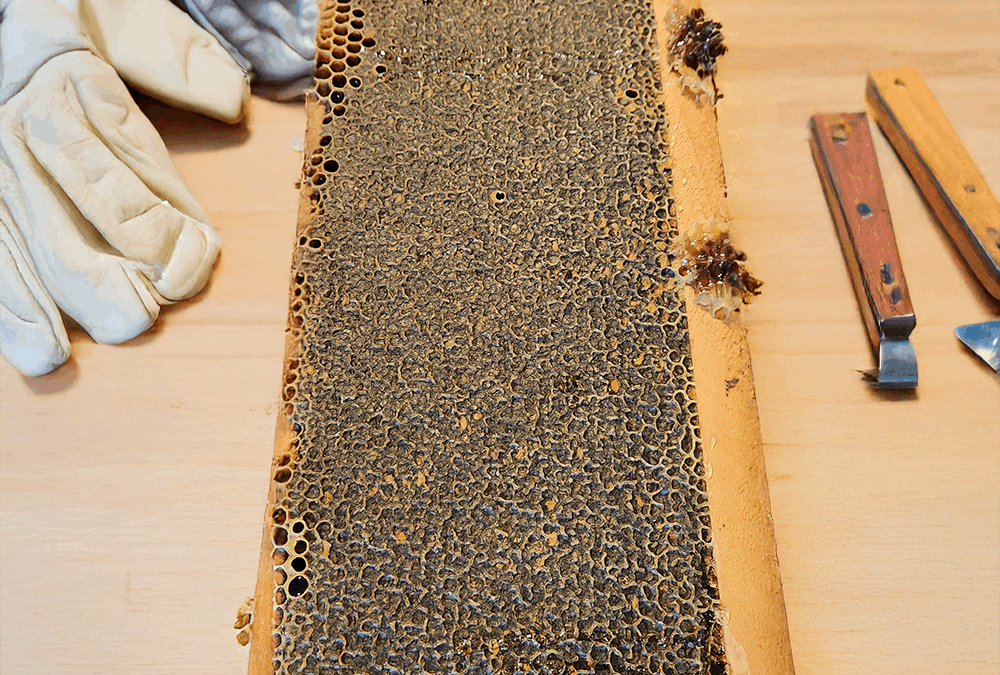
- A capped honey frame (look for at least 80% of the cells to be sealed with wax)
- An uncapping knife or a clean, serrated bread knife
- A large food-grade bucket (with a honey gate/spout if possible)
- A fine-mesh strainer or cheesecloth
- Glass jars for final storage
Step 1: Uncapping the Frame
The bees seal the honey in cells with a thin layer of beeswax. To get the honey out, you need to remove these “caps.”
- Hold the frame vertically over a clean tub.
- Using your uncapping knife, gently slice off the thin layer of wax.
Pro Tip: Dip your knife in hot water first—a warm blade slides through the wax like butter.
Step 2: Extracting the Honey
If you don’t have a spinner (extractor), you can use the Crush and Strain method:
- The Cut: Use a knife to scrape the honeycomb entirely off the plastic or wooden foundation into a large bowl.
- The Crush: Use a potato masher or a heavy spoon to break up all the wax cells.
- The Strain: Pour the mixture through your fine-mesh strainer into your food-grade bucket.
Step 3: Letting It Settle
Once the honey has strained through, let it sit in the bucket for 24 to 48 hours. This allows tiny air bubbles and any remaining microscopic wax particles to rise to the top, leaving you with crystal-clear honey at the bottom.
Step 4: Bottling
Open the spout at the bottom of your bucket and fill your jars. Be sure to leave about a half-inch of “headspace” at the top of each jar.
Important Note: Never heat your honey to make it flow faster. High heat can destroy the natural enzymes and delicate floral flavors that make raw honey so special.
Quick Tips for Success
- Keep It Warm: Harvest on a warm day or in a room that’s at least 75°F (24°C). Cold honey is incredibly thick and difficult to strain.
- Don’t Waste the Wax: Save the crushed wax cappings—you can melt them down later to make candles, lip balms, or furniture polish.
- Be Bee-Proof: Always harvest indoors or in a screened-in area. Otherwise, every bee in the neighborhood will show up for a free meal!
Stepping Up: Using a Heated Knife and Hand-Crank Extractor
If you want to keep your honeycomb intact—or you’re processing more than a couple of frames—using a centrifugal extractor is the way to go. Here’s how to master the process.
Step 1: Precision Uncapping with Heat
Using a heated uncapping knife makes the job feel like slicing through warm butter.
- Plug In and Preheat: Let your knife reach temperature for a few minutes.
- The Technique: Hold your frame vertically over an uncapping tank or clean plastic tub, resting the bottom of the frame on a solid surface.
- The Cut: Starting at the top or bottom (whichever feels most stable), slide the heated blade behind the wax cappings using a slight sawing motion.
- Keep It Shallow: Remove only the thin layer of wax, leaving the cell walls intact.
Safety Tip: Heated knives get very hot. Always place the knife on its stand when not in use, and keep it away from your fingers and any plastic frame parts.
Step 2: Loading the 2-Frame Extractor
A two-frame hand-crank extractor uses centrifugal force to pull honey out of the cells and throw it against the drum walls.
- Balance Is Key: Choose two frames that are roughly the same weight. If one side is heavier, the extractor may vibrate or “walk” across the floor.
- Placement: Slide the uncapped frames into the baskets.
Step 3: The Secret to Proper Spinning
Don’t start cranking at full speed. Spinning too fast while one side is full of heavy honey can blow out the delicate wax comb.
- First Spin: Crank slowly for 1–2 minutes to remove most of the honey from the first side.
- Flip: Remove the frames, flip them, and place them back in the extractor.
- Second Spin: Crank faster to empty the second side safely.
- Final Flip: Flip back to the first side and give it a final fast spin to remove remaining droplets.
Step 4: Straining and Bottling
As you spin, honey will pool at the bottom of the extractor.
Open the honey gate (the spout at the bottom) and let the honey flow through a double-sieve stainless steel strainer into your bottling bucket. The top sieve catches large wax chunks, while the fine-mesh sieve below catches smaller particles.
Why Beekeepers Love This Method
Using an extractor allows you to return drawn comb to the hive. Bees need roughly 8 pounds of honey to produce just 1 pound of wax, so giving them back their empty comb provides a massive head start on next year’s honey production.